There’s nothing like a berry Sponge Cake in the summer, especially a Strawberry Sponge Cake. This soft tender Sponge Cake contains no flavoring such as vanilla, therefore allowing the true flavor of the ingredients to come through. With fresh cream and strawberries to finish it, this Strawberry Sponge Cake is particularly delightful in the summer months but can be enjoyed year round!

Oftentimes referred to as a Victoria Sponge Cake, this Cake is thought to date back to 1615, you can read more about that in my Victoria Sponge Cupcakes recipe. I took this recipe for Cupcakes and adapted it to make two x 9 inch Victoria Sponge cakes. Feel free to use a couple of 8 inch pans for a deeper sponge.
Ingredients

- Flour: all purpose.
- Sugar: granulated.
- Eggs: whole.
- Butter: salted.
- Baking powder.
- Salt.
- Jam: Strawberry.
- Cream: heavy whipping.
Instructions How to Make the Strawberry Sponge Cake

With wax paper (grease proof paper) and a little butter or oil, grease the bottom and sides of two 9 inch cake pans.

Cut out or use pre cut sheets of wax paper and place them in the bottom of the pans. This is an additional measure to ensure the cakes will not stick.

Using a stand mixer or hand mixer, cream the butter and sugar together.

Butter and sugar being creamed.

Add each egg in one at a time. Cake batter needs to be well blended before the next egg is added.

Sift the flour, salt, and baking soda. This will ensure an even distribution of baking soda into the other dry ingredients and remove any lumps.

Add the flour mixture one tablespoon at a time, allow the cake batter to blend well before adding the next spoonful.

Then, add the warm water, one tablespoon at a time. Stop the mixer when everything looks blended.

Pour the cake batter evenly between the two prepared pans.

Tap the cake pans on the counter-top a couple of times to remove large pockets of air. The goal is to have fine air bubbles throughout but not a pocket of air. Place in a 350 degrees F oven for about 15 – 18 minutes.

When the cake has finished baking, remove it from the oven and place the cake pans on a wire rack. This allows air to reach the bottom of the pans as well as the sides and will allow the cakes to cool and not continue baking.
When both Sponge Cakes have cooled, run a thin bladed knife around the sides of the cake pan. Holding the cake pan in one hand, turn it onto the wire rack, it should release easily. Now it is ready to decorate.
Instructions How to Decorate the Strawberry Sponge Cake

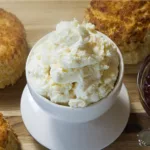
Using a stand mixer or hand mixer, whip the cream.

While the cream is whipping, remove the paper from the base of each cake layer.

Place one cake layer onto a serving plate and add the jam.

Spread the jam evenly over the sponge cake.

Stop whipping the cream when you see stiff peaks form.

Add the cream to the already spread jam.

Spread the cream evenly over the jam.

Position the other sponge cake directly on top. Decorate your cake with fruit and powdered sugar if desired.
Flexibility with Ingredients
Use vegetable shortening instead of butter in the same proportion.
Self raising flour will replace the all purpose flour and baking powder.
If substituting eggs with egg substitutes, refer to the manufacturer’s substitution guide.
Typically a Victoria Sponge cake is sandwiched together with a berry jam (that’s why I used strawberry) and fresh cream. Strawberry jam is traditional but raspberry can replace it. Replace fresh cream with buttercream. Using buttercream will allow the Strawberry Sponge Cake a longer shelf life and the ability to store it at room temperature. I recommend my Russian Buttercream for this Cake.

Traditionally a Victoria Sponge Cake receives a light dusting of powdered sugar. Even better is a Sponge Cake with a few fresh strawberries on top.
Can Victoria Sponge Cake be Low Sugar?
Good question! Baking is a science requiring accurate ratios for success. The classic ratio used for most Sponge Cakes is 1:1:1 ratio of sugar: butter : flour. Using less sugar will affect the quality of the Sponge Cake. Incidentally, this recipe for Sponge Cake has less sugar than a typical yellow cake – see the ‘Got Questions?’ section below for more info.
I’ll explain or rather I’ll allow the good folks at King Arthur Baking Company to explain, “In creaming the butter and sugar together, you are using the sugar to aerate the butter and fill it with bubbles that can capture the gasses released by your leavener. The more fine bubbles you have in your network, the lighter in texture your cakes will be and the finer the crumb.” So, reducing sugar content will reduce the airiness of the Sponge, which is not desirable. I do not recommend using sugar substitutes, use only real sugar in the quantity stated in the recipe card below.
Decorating this cake with a reduced sugar Strawberry jam and fresh cream is the only way to reduce the sugar content in this recipe.
Uses for Strawberry Sponge Cake
What is the purpose of Sponge Cake? Well, Strawberry Sponge Cake is an excellent addition to any afternoon tea menu or coffee and cake get together.
Use Sponge Cake as a base for a birthday cake or any other type of celebration cake. No special decorating skills needed, just some powdered sugar dusted on and some fresh berries.

Storage of Strawberry Sponge Cake
Can you freeze a Victoria Sponge Cake?
Short answer is yes:
- if you know you want to have this Sponge Cake at a later date, freeze the sponges separately, defrost in the refrigerator overnight and then add fresh cream and jam prior to serving it. Freeze sponges for up to 6 months.
- if the Strawberry Sponge Cake has been completed and you want to freeze it, then go ahead. Make sure it is well wrapped with plastic film (you don’t want any freezer odor to permeate into the Cake.) Defrost as usual and consider adding some powdered sugar or fresh strawberries to the top.
Store a completed Strawberry Sponge Cake in the refrigerator if whipped cream is an ingredient. Remove it about an hour before serving to allow it to come to room temperature.
Use buttercream instead of fresh cream to permit the Cake to be stored at room temperature. Keep it covered with plastic film or better yet under a glass cake dome.

A Tip From Me
Cakes take time and effort. Making sure the end result is a success very much depends on the sponge cakes releasing easily from the pans they baked in. I don’t take chances with this step of cake making. As you can see in the Instructions above, I like to grease pans with butter or oil even if they are non-stick. I then take a second step of lining the bottom of the pan with pre cut parchment or wax paper. You can also trace the cake pan around a sheet of parchment paper, then cut it out. Implementing these 2 steps, will ensure your cakes will release easily from their cake pans.
Weigh the pans to ensure even distribution of cake batter. Take a little from the heavier one and give to the other to even out the weight. This tip eliminates any guess work involved in making sure the cakes are even.
Got Questions?
I’ve got answers hopefully!
There are two categories for cake, shortened and unshortened. Shortened cakes contain fat either oil or butter / margarine. Then there are subcategories depending on the fat : flour : sugar ratio, the number of eggs used, flavorings added and method used. All of these factors affect appearance, texture, mouthfeel, taste, and nutritional value.
I’m assuming ‘regular’ cake to be yellow cake. Yellow cake is the most popular flavor of boxed (packaged) cake. Add oil and eggs and you’re good to go.
If making a from scratch yellow cake, then you can compare its ratio with Sponge Cake:
Yellow Cake: 2 : 1.8 : 1. Flour : Sugar : Butter.
Sponge Cake: 1 : 1 : 1. Flour : Sugar: Butter.
You can see that the Sponge Cake uses the same quantity of butter but the yellow cake contains more flour and sugar than the Sponge Cake. This affects the flavor, and texture.
Use your senses of smell, sight and touch to know if your cake has finished baking.
1) Use your sense of smell to check if the cake is done. You’ll start to smell the baked aroma that only a freshly baked cake can omit.
2) Secondly, you’ll be able to notice the cake is on its way to being golden brown. The sides of the cake are parting from the walls of the cake pan, and the cake has risen in depth.
3) Thirdly, is touch. Press gently on the top of the cake to see if it springs back. It can only do this when it has fully baked. Take a thin wooden skewer or a cake ‘tester’, which is a thin stainless steel stick, and poke it into the center of the cake. This is the last place the bake will cake, so if it is not ready, the wooden skewer or metal stick will have traces of raw batter on it.

Strawberry Sponge Cake
Ingredients
- 8 oz salted butter
- 8 oz all purpose flour
- 8 oz sugar
- 4 eggs room temperature
- 2½ tbsp warm water
- 2½ tsp baking powder
- ½ tsp salt
- 8 oz strawberry jam
- 10 oz whipping cream
- 2 oz fresh strawberries decoration (optional)
- 1 tsp powdered sugar
Instructions
- With wax paper (grease proof paper) and a little butter or oil, grease the bottom and sides of two 9 inch cake pans.
- Line the bottom of the pans with parchment or grease proof paper.
- Using a stand mixer or hand mixer, cream the butter and sugar together.
- Add each egg in one at a time. Allow the cake batter to blend well before the next egg is added.
- Sift the flour, salt, and baking soda. Add the flour mixture, one tablespoon at a time.
- Add the warm water, about a tablespoon at a time.
- Pour the cake batter evening between the two prepared pans.
- Tap the cake pans on the counter top a couple of times to remove large pockets of air. Place in a 350 degrees F oven for about 15 – 18 minutes.
- When baked, remove the cakes from the oven and place on a wire rack to cool.
- Further cool the cakes by running a thin bladed knife around the sides of the cake pan. Holding the cake pan in one hand, turn it onto the wire rack, it should release easily.
- Using a stand mixer or hand mixer, whip the cream.
- Remove the paper from the base of each cake layer.
- Place one cake layer onto a serving plate and add the jam. Spread the jam evenly over the sponge cake.
- When the cream develops peaks, spread it evenly over the jam.
- Place the other sponge cake directly on top making sure it is correctly positioned.
- Optional: Dust the top of the cake with powdered sugar and garnish with fresh strawberries.


Comments